Integrated Search Help
This is the help page for our Integrated Search feature. Access it here .
What is integrated search?
The Data Portal hosts many different datasets. The largest and most commonly used is our Specimens Collection , but there are 271 others. Previously, you could only search in one resource (one file within a dataset) at a time, but integrated search allows you to search multiple resources at the same time.
We've also made the search a lot more powerful by adding advanced features such as boolean logic (AND, OR, and NOT) and number-based range queries (greater than, less than), with more planned in the future.
The old search
If you still want to use the old search, we haven't removed anything. Just view the resource you want to search in and everything should be exactly the same as before.
1. UI Overview
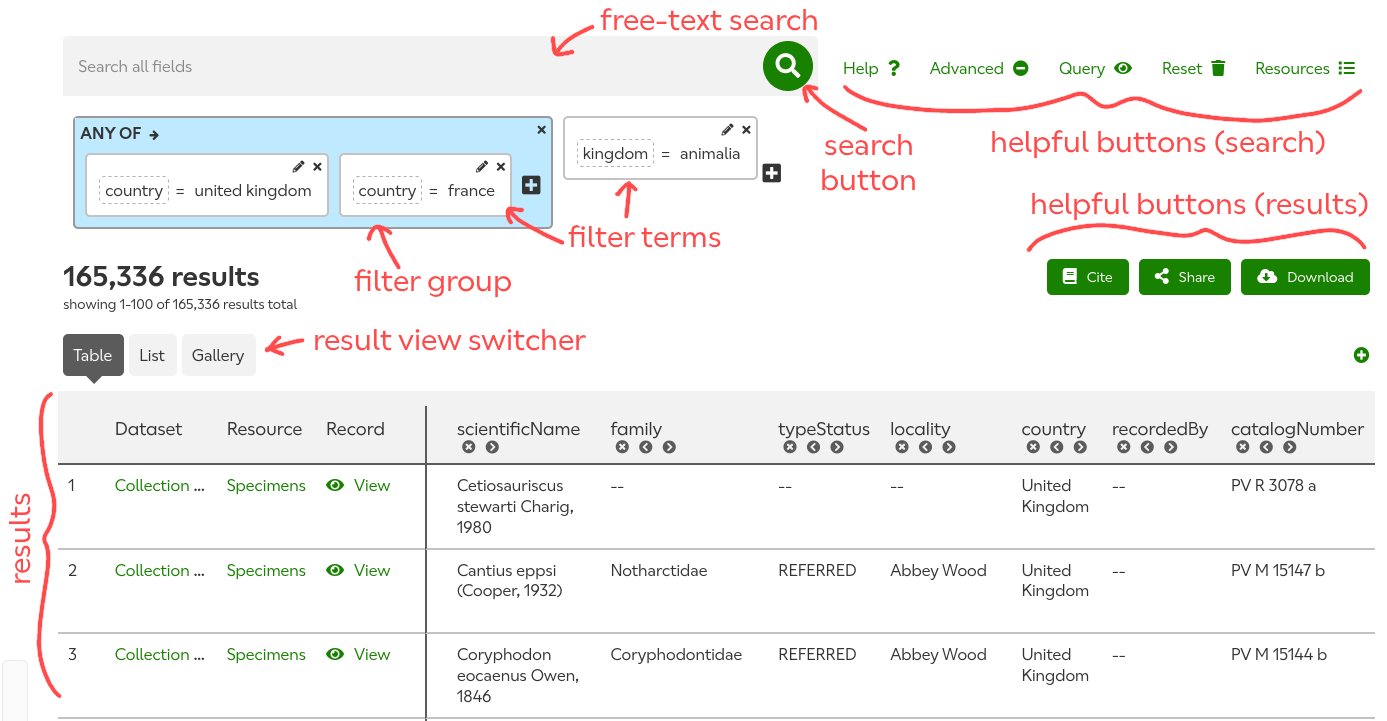
| Free-text search | Search all fields for the specified text. |
|---|---|
| Search button | Run the current query. |
| Helpful buttons (search) |
Help: takes you to this help page.
Advanced: hides/shows the filters (shown by default).
Query: shows the JSON query that will be submitted to the
API; useful if you need to troubleshoot or want to use the
search programmatically.
Reset: clears all the filters and free-text search.
Resources: view/edit the list of resources being searched
by the current query.
|
| Helpful buttons (results) |
Cite: generates a DOI for this search.
Share: generates a memorable link for social sharing.
Download: download the results.
|
| Filter terms | Filters on specific fields. |
| Filter group | Groups of filter terms (useful for advanced logic, e.g. OR or NOT queries). |
| Result view switcher | Change how the results are displayed; defaults to table. |
| Results | Records matching the current query, displayed using the current view type (e.g. table, list, or gallery). |
2. Constructing a search
2.1. Selecting resources
The integrated search can search across multiple resources (individual sets of records within datasets) simultaneously.
Clicking on Resources will bring up a dialog similar to this one:

To include a resource in your search, tick the box next to its name. You can
select/deselect all the resources within a dataset by clicking the dataset name
in green above it, and select/deselect all resources in the list using the
"select all" checkbox at the top of the list. To deselect everything
except the resources in one particular dataset, hold the
alt key and click the dataset name.
To dismiss the dialog and save your changes, click outside the box.
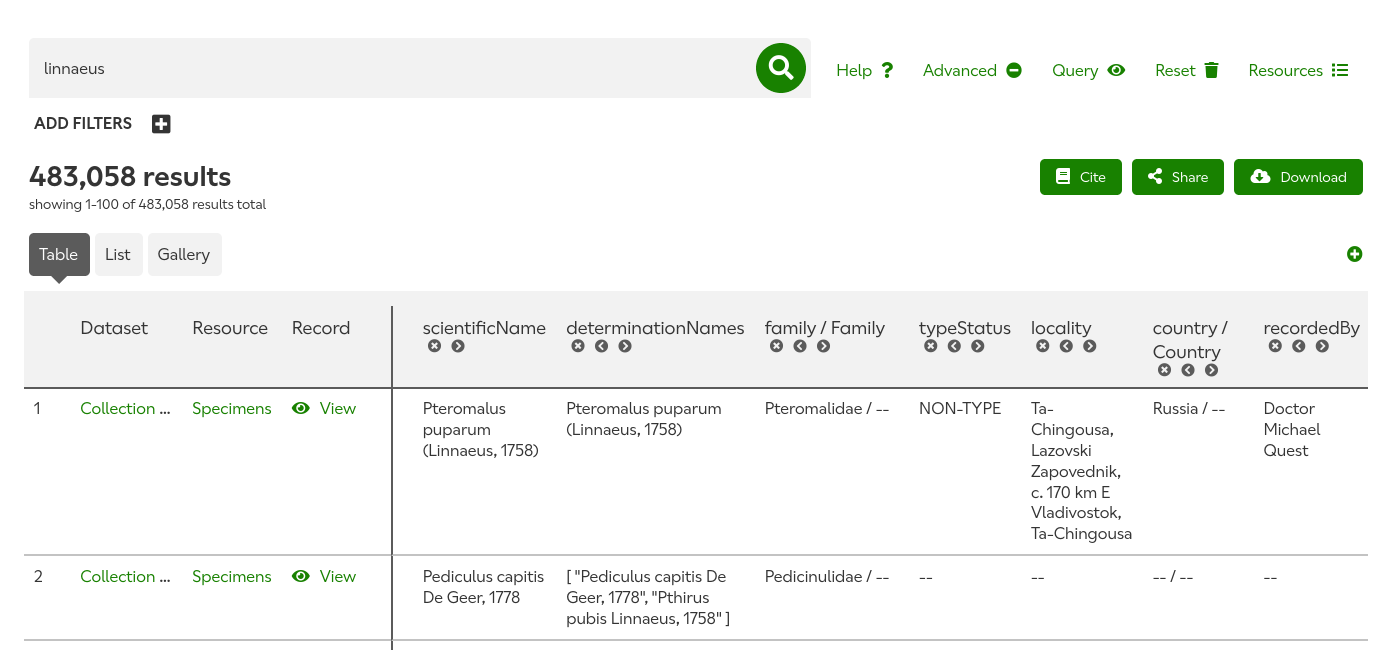
2.2. Free-text search
The free-text search box allows you to search all fields in your chosen resource list. For example, the free-text search "linnaeus" will find records where "Linnaeus" is in scientificName and those where "Linnaeus" is in determinationNames.
2.3. Filters
Below the free-text search is the filter builder. Filter can refer to any part of this: a whole group of multiple items, or a single item. Each of the smallest items are referred to as terms, and they are linked together in groups. For example:

There are two terms in this filter: kingdom = animalia and collectionCode = zoo. They are linked together in an AND (all) group.
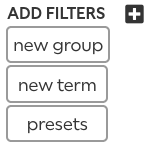
To add a filter term or group, click the icon in the filter builder, then select the option you need.

2.3.1. Filter Terms
A term filters on field names (i.e. it will be applied to every field with that name in every resource in the query - case-insensitively). Terms are the basic units of filtering.
To add a new term, click the icon and click "new term". This will bring up the term editor.
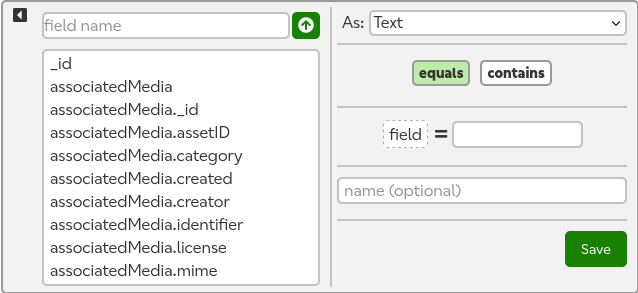
On the left side, select the fields to search in. Typing in the textbox will filter the list; you can then select a field by clicking on it. To remove a field name, click the icon.

On the right side, specify the details of your query: field type, comparison type, and values.
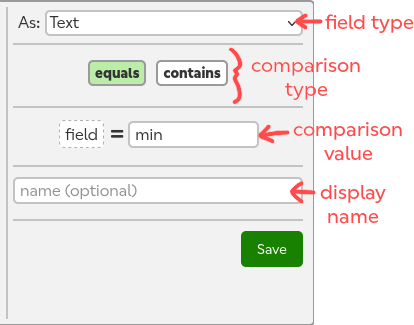
Field type is the data type that the field will be read as. Most queries will use the default "Text" type, but more complex queries may use the "Number" or "Geo" types. A fourth type, "Any", only has one comparison type ("exists") and just checks if the field has any content at all.
Comparison type describes how the field value will be compared to the query/comparison value. Each field type has different comparison types available.
Comparison value is the value to which the field values will be compared.
Display name is entirely optional, but may be useful for especially complex queries with many terms: it allows you to set a "friendly" display name for the term, so it will be shown in a more memorable way.
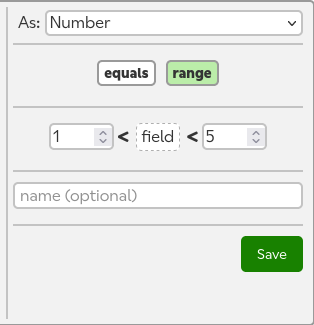
A number range query: matching fields will contain a number between one and five. (Click the angle brackets to toggle equality comparisons).

A geo point query: matching records will have coordinates within five miles of the specified coordinates.
NB: geo queries do not use field names. They are based on longitude and latitude points that are set elsewhere by the resource maintainer.
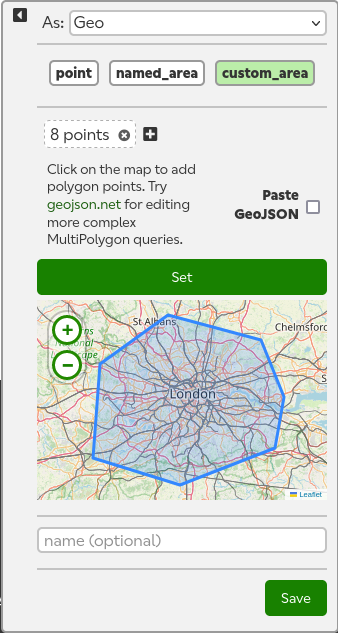
A geo polygon query: matching records will have coordinates inside the specified area.
You can continue adding as many terms as necessary to your query:

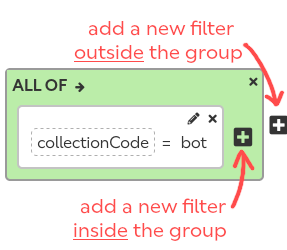
2.3.2. Filter Groups
Groups allow you to link terms and use some boolean logic in your queries. You can have three types of group: AND (aka 'all of'), OR (aka 'any of'), and NOT (aka 'none of'). To change the group type, click the name in the top left corner. In the groups below, the terms are the same but the group type has changed. This drastically changes the records found.
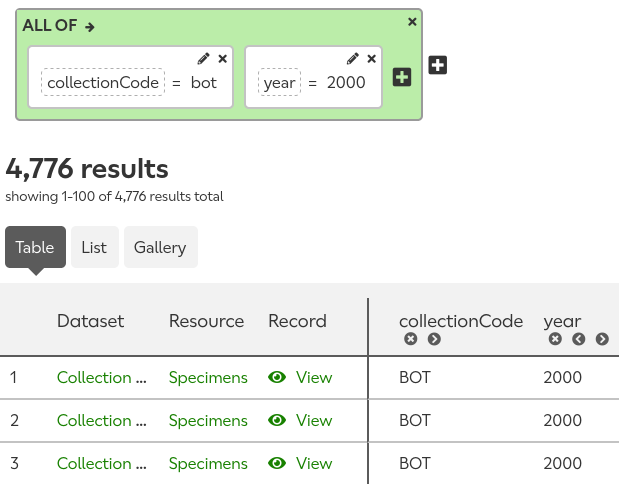

- In the first group, each record must match all of the terms; so each record must have collectionCode=BOT and year=2000.
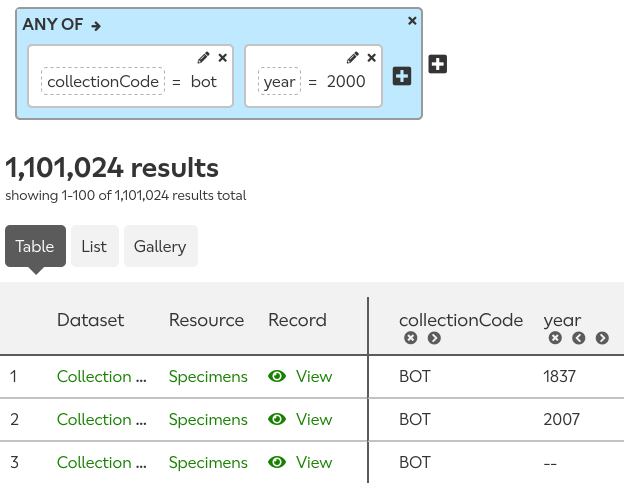
- In the second group, each record can match any of the terms; so each record must have collectionCode=BOT or year=2000 (or both!).
- In the third group, each record must not match any of the terms; so the records match neither collectionCode=BOT nor year=2000.
Groups can also be nested under the top level:
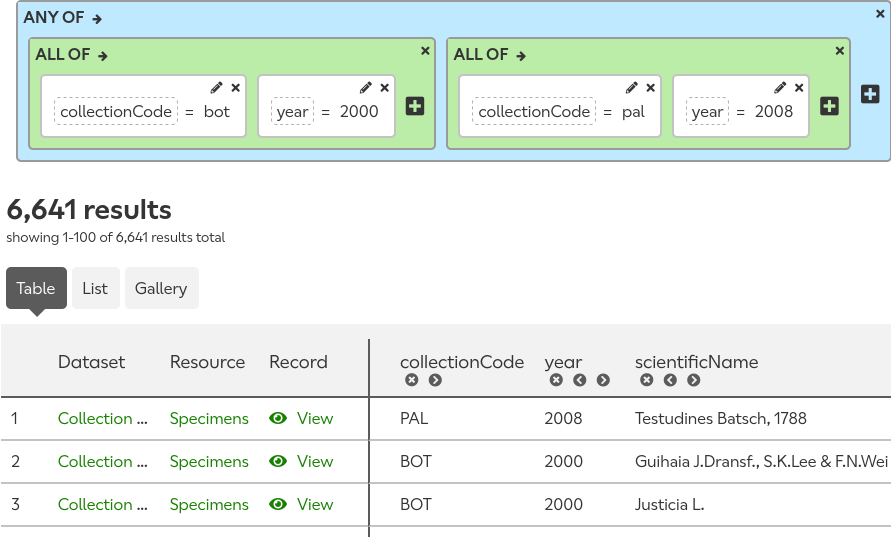
This query would search for either botany records from 2000 or palaeontology records from 2008.
NB: when you're using the user interface, the whole query is wrapped in a hidden "and" group.
2.3.3. Presets
Presets are predefined filter terms that are commonly used and/or need to be dynamically set. There are currently very few of these, but more can be added later. Please contact us if you need one of these presets added.
There are two types of presets: static and dynamic. These are both found in the same place.
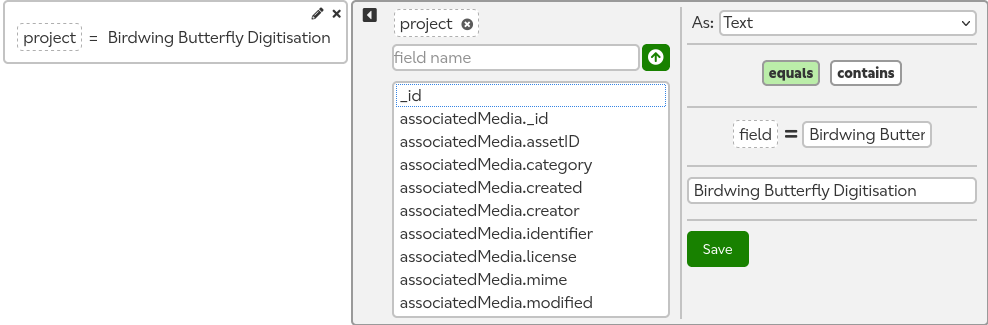
A static preset contains the same information every time, e.g. the
Birdwing Butterfly Digitisation will always add a term where
project = Birdwing Butterfly Digitisation .
Dynamic presets change their value dependent on other factors in the
query at the time they are added. Once added, they act like every other
filter term, so try to add these last if possible. An example is the
Has Image preset, which extracts image fields from the current list of
resources and adds an "exists" term that checks if these fields
have content in them.
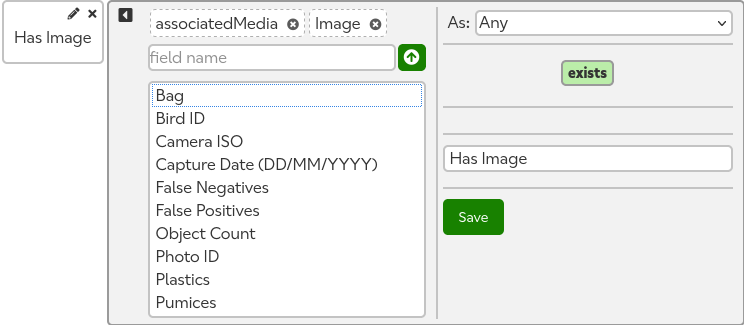
In this example, multiple resources with an image field are being searched, so multiple image fields are added to the term. Not every resource will have an image field set, and those that do may share field names with other resources, so the list is likely to be much shorter than the actual list of resources.

In contrast to the previous image, in this example only one resource with an image field is being searched (or, all the resources being searched have the same image field name), so only one field is selected.
3. Results
3.1. Views
The results of a search can be displayed in different ways, termed "views". To change the view, click the name of the view above the results (see Result View Switcher in 1. UI Overview).
The fields shown are based on your query (e.g. if you search for year < 2000, it will show you year first), some standard columns based on user feedback (e.g. scientificName, family, typeStatus) and some that are dynamically selected as having high relevance. The fields shown can be changed in the table view and will also apply to list view; however, they are reset for each new search.
3.1.1. Table View
The table view is the default view. It displays the results in tabular form.
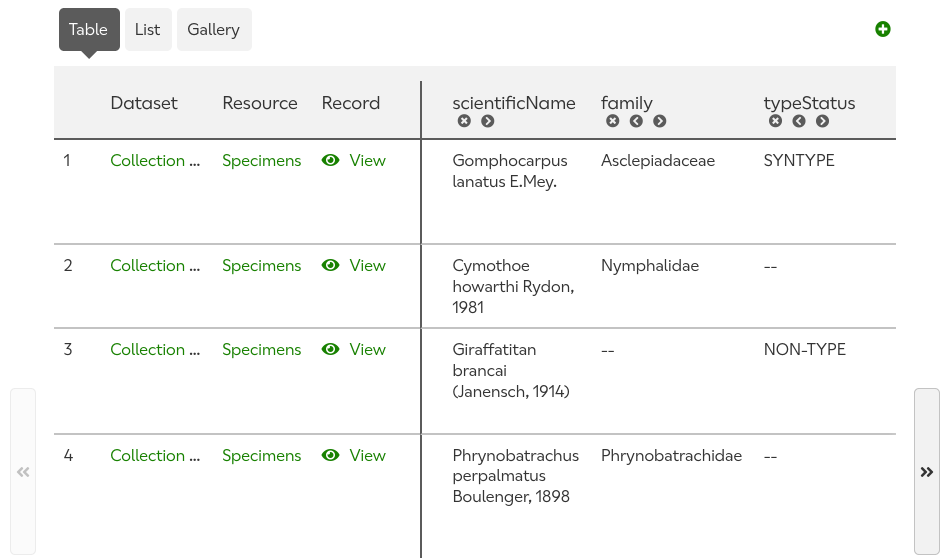
The first three columns contain links to the dataset, resource, and full details of the record. The following columns contain a selection of fields summarising the record.
Existing columns can be removed by clicking the "x" icon underneath the header and moved left or right by clicking the arrow icons. New columns can be added by clicking the green plus icon above the table. Note that new columns are added at the end of the list and may not be visble without scrolling.
The table can be scrolled to the left or right by clicking the tall double arrow icons at the sides of the table.
3.1.2. List View
The list view displays a short summary of each record individually, along with thumbnails of any associated images (if there are any).
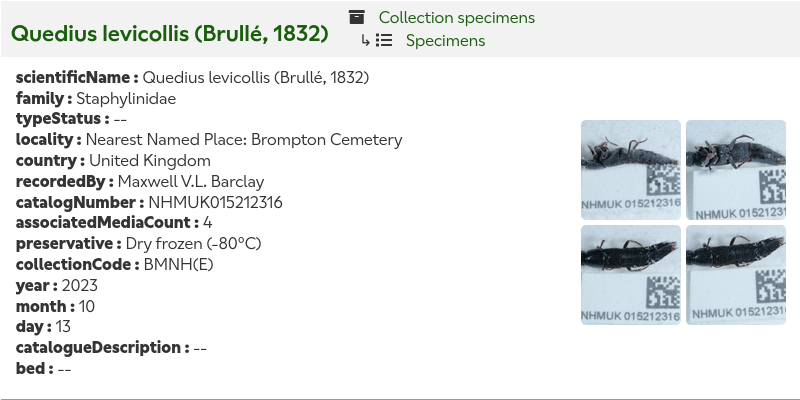
The item header links to the full record, dataset, and resource.
Clicking on an image brings up the viewer overlay, which displays a larger version and offers an option to download the image.
The fields displayed can be changed by going to table view, changing the columns, and switching back to list view.
3.1.2. Gallery View
The gallery view displays all the images associated with records in the search. It does not show records separately, but simply lists out all available images for each page of results.
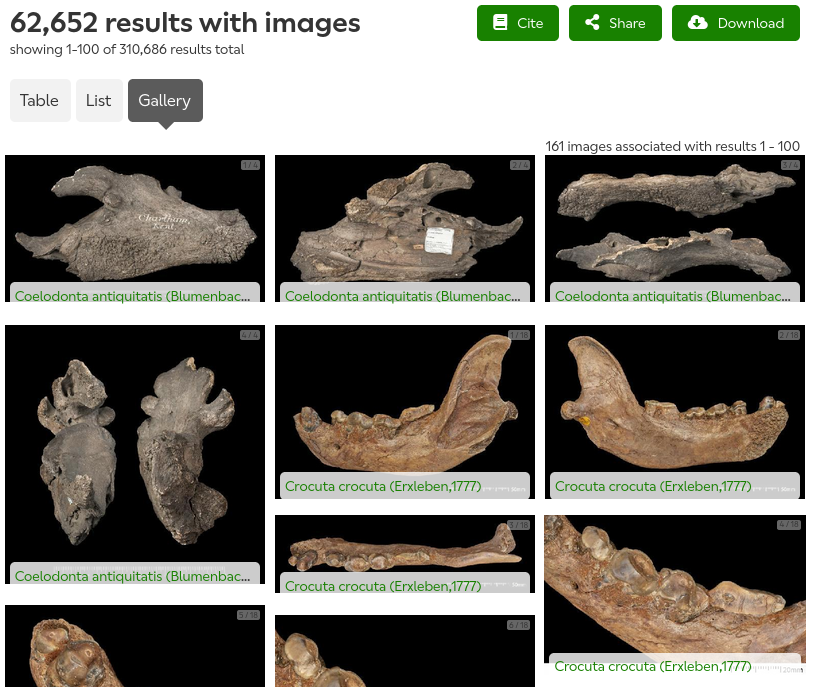
Not all records will necessarily have images, so the images displayed may not match the records on previous pages. The header details how many records in your total result set have available images and are therefore shown in this view.
Many records will also have multiple images, so there will often be more than 100 images on the page although only 100 records are being represented. The small number indicator in the top right of each thumbnail shows how many images are in the record and which number that item is.
Clicking on the caption of the image (usually the scientific name of the specimen) opens the record.
Clicking on an image brings up the viewer overlay, which displays a larger version and offers an option to download the image.
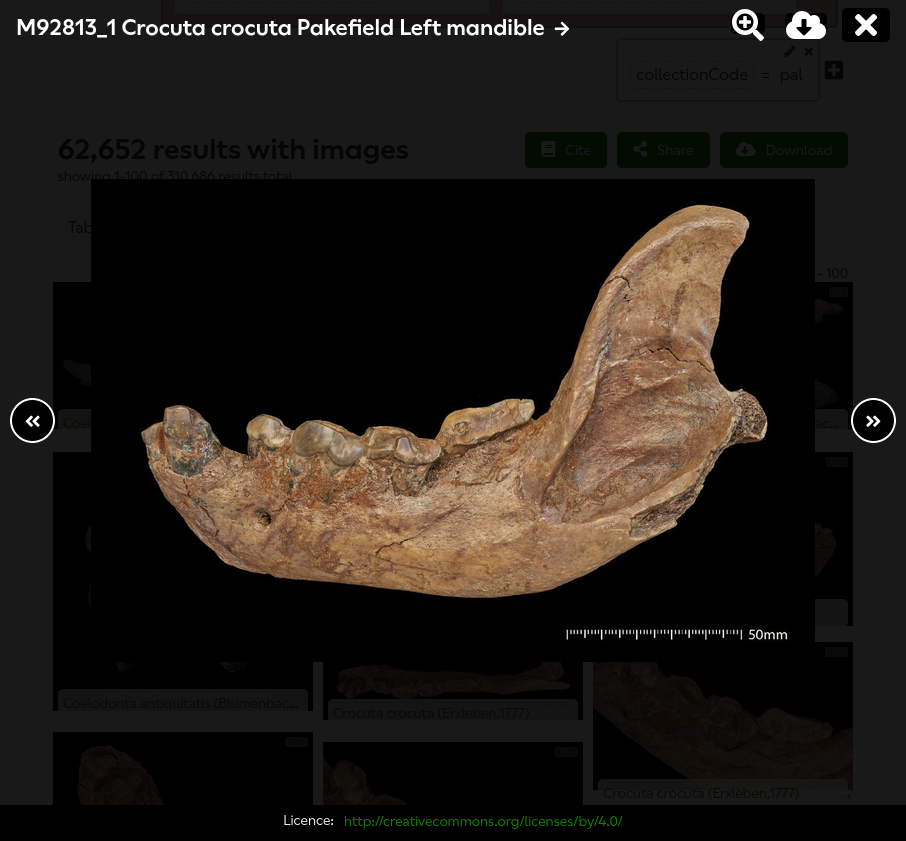
The image viewer doesn't currently have any features like zooming or other image manipulation. The magnifying glass icon in the top right opens the image in our large image viewer, which has all of these features.
The image title at the top links to the main record.
The cloud download icon lets you download the full size original image.
The left and right arrows cycle through other images on the page.
The licence information is at the bottom of the viewer.
3.2. Buttons
These buttons appear at the top of the results view.

3.2.1. Cite
The cite button generates a digital object identifier (DOI) for the search, allowing you to easily cite the results in publications.
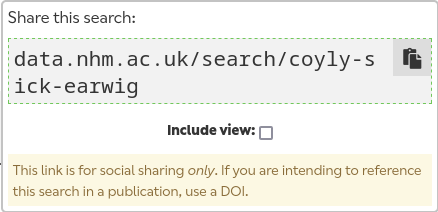
3.2.2. Share
The share button also generates a link to the search, but it is intended for more informal use, such as when sharing a search with a colleague. It uses three random words to create a memorable short link (with the option to include the view, and page if there are more than 100 results) that can then be shared.
3.2.3. Download
The download button allows you to request a full download of the results.
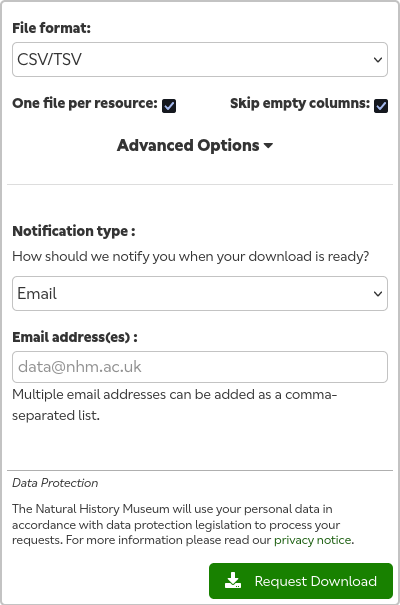
Multiple formats are available, and each can be configured. The default option will create a zip of comma-delimited CSV files, one per resource, skipping any columns where none of the results have a value.
Because result sets can be very large, these files may need time to be created. By default, the form will ask you for an email address so that you can be notified by email when your download is ready, but if you would prefer not to provide this then you don't have to. You can also send the notification to a webhook endpoint or select no notification. If you choose this option then you'll have to make sure you save the URL of the download status page when it appears, as this will be the only way for you to access your download.
4. Troubleshooting
4.1. Resetting
This is a good place to start for fixing any UI issues, e.g. menus not loading or popup boxes dismissing as soon as you click them.
- If you're able to, get a sharing link (see 3.2.2. Share);
-
Either go to the sharing link (if you have one) or hard-refresh the
page with
CTRL+F5. - If that still doesn't work, Reset your query, refresh, and start again.
As always, if you have any further issues, questions, or suggestions, please contact us. We are also available on Gitter.